GE Refrigerator Repair Manual: A Comprehensive Guide
This manual provides detailed instructions for diagnosing and fixing common GE refrigerator issues, utilizing error codes, wiring diagrams, and component testing methods.

Successfully repairing your GE refrigerator demands a systematic approach. This guide empowers both seasoned DIYers and novices with the knowledge to tackle common problems. Understanding basic appliance repair principles, alongside access to service manuals – including parts lists and wiring diagrams – is crucial.
Prioritize safety by disconnecting power before any work begins!
Understanding GE Refrigerator Models
GE refrigerators encompass diverse series, each with unique characteristics. Identifying your specific model number – typically found on an interior panel – is paramount for accurate diagnosis and parts sourcing. Familiarize yourself with common series peculiarities to streamline the repair process and ensure compatibility of replacement components.
Identifying Your Specific Model Number
Locating your GE refrigerator’s model number is crucial for repair. It’s generally affixed to a label inside the refrigerator compartment, often on a side wall or near the crisper drawers. This number unlocks access to specific wiring diagrams, parts lists, and troubleshooting guides tailored to your appliance.

Common GE Refrigerator Series & Their Peculiarities
GE Profile models often exhibit issues with ice buildup due to defrost system failures. GE Side-by-Side refrigerators are prone to water dispenser malfunctions, frequently linked to the water inlet valve. Top-freezer models commonly experience cooling problems stemming from dirty condenser coils, impacting efficiency.
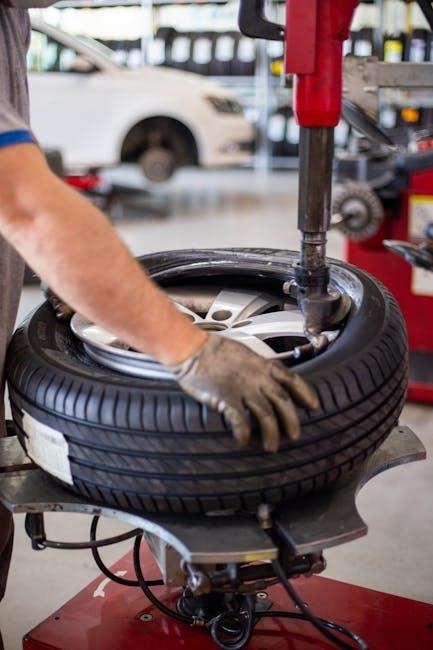
Essential Tools for GE Refrigerator Repair
Successful repairs require a toolkit including screwdrivers, wrenches, and pliers for disassembly. A multimeter is crucial for component testing, while a vacuum pump and manifold gauges are needed for refrigerant work. Access to service manuals and wiring diagrams is also essential for accurate diagnostics and repairs.
Basic Hand Tools (Screwdrivers, Wrenches, Pliers)
A variety of screwdrivers (Phillips and flathead) are fundamental for accessing components. Wrenches, in both standard and adjustable sizes, aid in loosening and tightening fasteners. Pliers – including needle-nose and slip-joint – assist with gripping, bending, and manipulating wires and small parts during the repair process.
Specialized Tools (Multimeter, Vacuum Pump, Manifold Gauges)
A multimeter is crucial for testing electrical components like relays and capacitors. Refrigerant work necessitates a vacuum pump to evacuate the system and manifold gauges to measure pressures. These tools are essential when dealing with sealed system repairs, requiring specialized knowledge and adherence to safety protocols.
Safety Precautions Before Starting Repairs
Always disconnect the refrigerator’s power supply before any repair work to avoid electrical shock. Handling refrigerant requires extreme caution; it can cause frostbite and environmental damage. Proper ventilation is key. Never use a hair dryer to defrost, as it can damage components. Prioritize safety!
Electrical Safety – Disconnecting Power
Before commencing any GE refrigerator repair, completely disconnect the appliance from its power source. Locate the circuit breaker and switch it off, or unplug the refrigerator directly from the wall outlet. Verify power is off with a multimeter. This crucial step prevents dangerous electrical shocks during the repair process.
Handling Refrigerant Safely
GE refrigerators utilize refrigerant, a potentially harmful substance. Do not attempt to discharge or handle refrigerant yourself; it requires EPA certification. If a refrigerant leak is suspected, contact a qualified appliance repair technician immediately. Improper handling can cause environmental damage and personal injury – prioritize safety!
Common GE Refrigerator Problems & Solutions
Frequent issues include cooling failures (often evaporator fan or coil related), ice buildup blocking airflow to the refrigerator section, and water dispenser malfunctions. Dirty condenser coils significantly reduce cooling efficiency. Diagnosing these problems often involves checking for ice obstructions and testing components like the water inlet valve.
Refrigerator Not Cooling, Freezer Works (Evaporator Fan/Coil Issues)
This symptom frequently points to evaporator fan failure or significant ice buildup obstructing airflow. A malfunctioning fan prevents cold air circulation. Extremely dirty condenser coils also hinder heat dissipation, causing this issue. Inspect the fan for operation and clear any ice blocking the evaporator coils immediately.
Ice Buildup in Freezer/Refrigerator Compartment
Excessive ice accumulation often restricts airflow, impacting cooling performance. A faulty defrost system – timer, heater, or thermostat – is a primary cause. Avoid using a hairdryer to expedite melting, as this can damage components. Check for blocked ducts; ice may obstruct airflow to the refrigerator section.
Water Dispenser Issues (Water Inlet Valve, Filter)
Problems with water dispensing frequently stem from a clogged water filter or a malfunctioning water inlet valve. Regularly replacing the filter is crucial for optimal function. Inspect the valve for proper operation and ensure the water supply line isn’t kinked or frozen, hindering water flow.

Diagnosing GE Refrigerator Issues
Accurate diagnosis is key to effective repair. Utilize GE’s error codes as a starting point for troubleshooting, referencing service manuals for specific meanings. Component testing, including relays, capacitors, and thermistors, with a multimeter, helps pinpoint faulty parts. Careful observation and systematic testing are essential.
Using Error Codes for Troubleshooting
GE refrigerators often display error codes to indicate specific problems. Consult the refrigerator’s service manual or GE’s official support website to decipher these codes. These codes narrow down potential issues, saving time and effort during diagnosis; Understanding these signals is crucial for targeted repairs.
Component Testing (Relays, Capacitors, Thermistors)
A multimeter is essential for testing relays, capacitors, and thermistors. Check for continuity in relays, capacitance in capacitors, and resistance in thermistors. Compare readings to specifications in the service manual. Faulty components often cause cooling or operational failures, requiring replacement for proper function.
Replacing the Condenser Coils
Accessing condenser coils involves removing the refrigerator’s baseplate, typically secured with Phillips head screws. Inspect coils for damage or corrosion; cleaning may suffice if not severely compromised. Replacement requires disconnecting refrigerant lines – a task best left to certified technicians due to EPA regulations.
Accessing the Condenser Coils
To reach the condenser coils, carefully unplug the refrigerator and move it away from the wall. Remove the bottom access panel using a Phillips head screwdriver. The coils are typically located at the rear, appearing as black, rolled-up structures within the fridge’s base.
Cleaning vs. Replacing Coils
Often, dirty condenser coils are the culprit for cooling issues; cleaning is the first step. If coils are severely corroded or damaged, replacement is necessary. Cleaning involves vacuuming dust and debris; replacement requires disconnecting refrigerant—best left to a qualified technician.
Repairing the Evaporator Fan Motor
Accessing the evaporator fan typically involves removing freezer components. Test the fan motor for continuity with a multimeter; a lack of continuity indicates failure. Replacement requires disconnecting the old motor and securely connecting the new one, ensuring proper airflow within the freezer compartment.

Locating and Accessing the Evaporator Fan
The evaporator fan is usually behind a rear freezer panel. Begin by removing the freezer shelves and back panel, often secured with screws. Carefully disconnect any wiring harnesses before removing the fan housing. Be gentle to avoid damaging surrounding components during access and removal.
Testing and Replacing the Fan Motor
Use a multimeter to check the fan motor for continuity; a lack of continuity indicates a faulty motor. Disconnect the old motor and install the new one, ensuring proper wiring connections. Verify the fan blade spins freely before reassembling the freezer components and restoring power.
Troubleshooting the Defrost System
A malfunctioning defrost system causes ice buildup. Check the defrost timer or control board for proper operation. Inspect the defrost heater and thermostat for continuity using a multimeter; a failed heater or thermostat prevents proper defrosting. Address any issues promptly to restore cooling efficiency.
Defrost Timer/Control Board Issues
Defrost timers initiate the defrost cycle; control boards manage it electronically. A faulty timer may not advance, preventing defrost. Control board failures can disrupt the entire process. Testing requires a multimeter to verify voltage and continuity. Replacement is often necessary for reliable defrost function.
Defrost Heater and Thermostat Problems
The defrost heater melts ice buildup, while the thermostat monitors temperature, cycling the heater on/off. A burned-out heater won’t defrost. A faulty thermostat may prevent heating or cause overheating. Use a multimeter to test heater continuity and thermostat operation; replacement resolves these issues.
Addressing Water Leaks
Water leaks often stem from supply lines, the water inlet valve, or a clogged defrost drain. Inspect connections for tightness and cracks. A faulty valve may drip continuously. Clear drain lines to prevent overflow. Carefully identify the leak’s origin before attempting repairs, ensuring power is disconnected first.
Identifying the Source of the Leak
Begin by tracing the water path – is it from the dispenser, ice maker, or inside the fridge? Check water lines, connections, and the drain pan. Look for drips near the water inlet valve. Inspect the defrost drain for blockages. A thorough visual inspection is crucial for pinpointing the leak’s exact origin.
Repairing Water Lines and Connections
Tighten loose fittings with appropriate wrenches, avoiding over-tightening which can cause cracks. Replace damaged water lines with GE-approved parts. Ensure proper sealing using Teflon tape or O-rings. Carefully inspect the water inlet valve for leaks and replace if necessary. Test repairs thoroughly after reconnection.
GE Refrigerator Wiring Diagrams

Understanding wiring schematics is crucial for accurate diagnosis and repair. Locate diagrams specific to your model number – often found in service manuals or online. These diagrams illustrate component connections, aiding in troubleshooting electrical issues. Carefully trace wires and identify components before disconnecting anything.
Understanding Wiring Schematics
Schematics depict the electrical pathways within your GE refrigerator. Symbols represent components like relays, capacitors, and thermistors. Tracing these lines reveals how parts interact. Color coding assists in identifying wires; always verify with the diagram. Proper interpretation prevents shorts and ensures safe, effective repairs.
Locating Wiring Diagrams for Your Model
Finding the correct wiring diagram is crucial for successful repair. GE’s official support website offers diagrams based on your model number. Service manuals, available as PDF downloads, contain comprehensive schematics. Online appliance repair forums, like r/appliancerepair, may also host diagrams shared by experienced users.
Finding GE Refrigerator Parts
Sourcing replacement parts requires choosing between Original Equipment Manufacturer (OEM) and aftermarket options. OEM parts guarantee compatibility but are typically pricier. Reliable suppliers include GE’s official parts store and authorized appliance parts retailers. Carefully verify the part number before ordering to ensure a proper fit.
OEM vs. Aftermarket Parts
Original Equipment Manufacturer (OEM) parts are made by GE, ensuring exact fit and quality, but come at a higher cost. Aftermarket parts, produced by third parties, are generally cheaper but may vary in quality and compatibility. Consider the repair’s criticality when deciding between OEM and aftermarket options.
Reliable Parts Suppliers
Several online retailers specialize in appliance parts. Look to reputable suppliers for GE refrigerator components, ensuring genuine or high-quality aftermarket options. Checking customer reviews and return policies is crucial before purchasing. Some popular choices include AppliancePartsPros, RepairClinic, and Sears PartsDirect for reliable sourcing.
Preventative Maintenance for GE Refrigerators
Regular maintenance extends your GE refrigerator’s lifespan and efficiency. Prioritize cleaning the condenser coils at least twice yearly to ensure proper heat dissipation. Implement a consistent filter replacement schedule – typically every six months – for optimal water and ice quality, preventing buildup.
Regular Coil Cleaning
Dirty condenser coils force the refrigerator to work harder, reducing efficiency and potentially causing failure. Access coils by removing the bottom plate at the rear; unplug the fridge first! Use a brush or vacuum to remove dust and debris, ensuring optimal airflow for heat dissipation.
Filter Replacement Schedule
Regular water filter changes are crucial for clean water and optimal refrigerator performance. GE recommends replacing filters every six months, though usage impacts this timeline. Ignoring replacements can lead to reduced water flow, unpleasant tastes, and potential damage to the water dispenser system.
Resources for GE Refrigerator Repair
For additional support, explore online appliance repair forums like r/appliancerepair on Reddit, offering community insights and troubleshooting advice. The official GE support website provides manuals, FAQs, and direct assistance. Utilizing these resources can supplement this manual and expedite your repair process.
Online Forums (r/appliancerepair)
The r/appliancerepair subreddit is a valuable community resource for GE refrigerator troubleshooting. Users frequently share experiences, like diagnosing cooling issues where dirty coils or a failing condenser fan were the cause. Expect practical advice and potential solutions from fellow appliance enthusiasts and experienced technicians.
GE Official Support Website
GE’s official support website offers a wealth of resources, including service manuals for download. These manuals contain crucial repair information like parts lists, disassembly guides, diagnostic procedures, wiring diagrams, and error code explanations – essential for effective troubleshooting and component testing of your GE refrigerator.