Drywall Installation Guide PDF: A Comprehensive Plan
This guide provides a structured approach to drywall installation, encompassing essential steps from preparation to finishing. Utilizing resources like the PURPLE drywall with GridMarX, this plan emphasizes efficient techniques, including horizontal installation and proper joint treatment with gypsum compounds. Screw drywall into repair clips.
Drywall installation is a crucial aspect of modern construction, offering a swift and efficient alternative to traditional masonry. Its speed, being three to four times faster, significantly reduces construction time. This comprehensive guide aims to simplify the process, whether you’re a seasoned professional or a DIY enthusiast.
The guide covers everything from understanding the benefits of drywall to troubleshooting common problems. Notably, PURPLE drywall, featuring unique GridMarX guide marks, streamlines installation. We will explore the importance of accurate measurements, proper cutting techniques, and secure hanging methods.
Furthermore, we will delve into the art of taping and mudding, ensuring seamless joints and a flawless surface. Sanding techniques for achieving a smooth finish will be discussed, along with priming and painting for a professional look. Remember to account for overage when cutting and piecing.
By following this guide, you’ll gain the knowledge and confidence to tackle drywall installation projects with ease, achieving high-quality results every time. This manual is your companion to navigate the intricacies of drywalling.
Tools and Materials Checklist
Before embarking on your drywall installation project, gathering the necessary tools and materials is paramount for a smooth and efficient process. This checklist ensures you have everything at your fingertips, minimizing interruptions and maximizing productivity. First and foremost, you’ll need drywall sheets, ideally PURPLE drywall with GridMarX for ease of measurement and cutting.
Accurate measurement tools are essential, including a measuring tape, level, and T-square. For cutting, a drywall knife or utility knife is crucial, along with a drywall saw for intricate cuts. Securing the drywall requires drywall screws and a screw gun or drill with a screw bit. Don’t forget drywall repair clips.
Moving on to joint treatment, you’ll need joint compound (mud), taping knives of various sizes, and drywall tape (paper or mesh). A mud pan or hawk is helpful for holding the compound. Sanding sponges or sandpaper, along with a sanding block, are needed for smoothing the dried compound. Safety glasses and a dust mask are crucial for personal protection.
Finally, for finishing, you’ll need a primer and paint, along with rollers, brushes, and paint trays. Having all these items prepared in advance is a necessary component for successful drywall installation.
Preparation: Framing and Measuring
Proper preparation is the cornerstone of a successful drywall installation. This stage focuses on ensuring the framing is sound and accurately measuring the areas to be covered. Begin by inspecting the framing for any imperfections, such as loose nails or warped studs. Ensure studs are properly spaced, typically 16 or 24 inches on center, to provide adequate support for the drywall sheets. Add wood blocks;
Next, meticulous measuring is crucial. Measure each wall and ceiling section accurately, accounting for windows, doors, and other openings. Transfer these measurements to your drywall sheets, utilizing the GridMarX guide marks on PURPLE drywall to simplify the process. Remember to allow a 10 to 15 percent overage for cutting and piecing, minimizing waste.
When measuring, consider the orientation of the drywall sheets. Horizontal installation, at a right angle to the framing, is often preferred, starting with the top board. Proper measuring ensures minimal gaps and seams, leading to a smoother and more professional finish. Accurate measurements and calculations will help you use the drywall more efficiently.
Pay close attention to corners and angles, as these often require more precise cuts. By investing time in thorough preparation and accurate measuring, you’ll set the stage for a seamless drywall installation process.
Cutting Drywall: Techniques and Tips
Achieving clean and precise drywall cuts is essential for a professional-looking installation. Several techniques and tools can aid in this process, ensuring minimal waste and tight-fitting seams. A utility knife with a sharp blade is your primary tool for cutting drywall. Always use a fresh blade to ensure clean cuts and prevent tearing the paper facing.

For straight cuts, measure and mark the desired length on the drywall sheet. Use a T-square or straightedge as a guide and score the paper facing with the utility knife. Apply consistent pressure to create a clean, shallow cut. Next, snap the drywall along the scored line by applying pressure on the opposite side. Finally, cut through the paper backing to complete the separation.
For curved cuts or irregular shapes, a drywall saw or keyhole saw is more suitable. Carefully follow the marked lines, using a steady hand to create smooth curves. When cutting around openings, such as windows or doors, measure accurately and use a combination of straight and curved cuts as needed.
Utilize the GridMarX guide marks on PURPLE drywall to simplify measuring and cutting. These pre-printed lines provide a visual aid for accurate cuts, reducing errors and waste. Remember to always cut with precision and safety in mind.
Installation: Hanging Drywall Sheets
Properly hanging drywall sheets is crucial for a smooth and professional finish. Start by determining the orientation of the sheets – horizontal or vertical – based on your wall height and framing layout. Horizontal installation, with the top board installed first, is often preferred as it minimizes the number of seams.
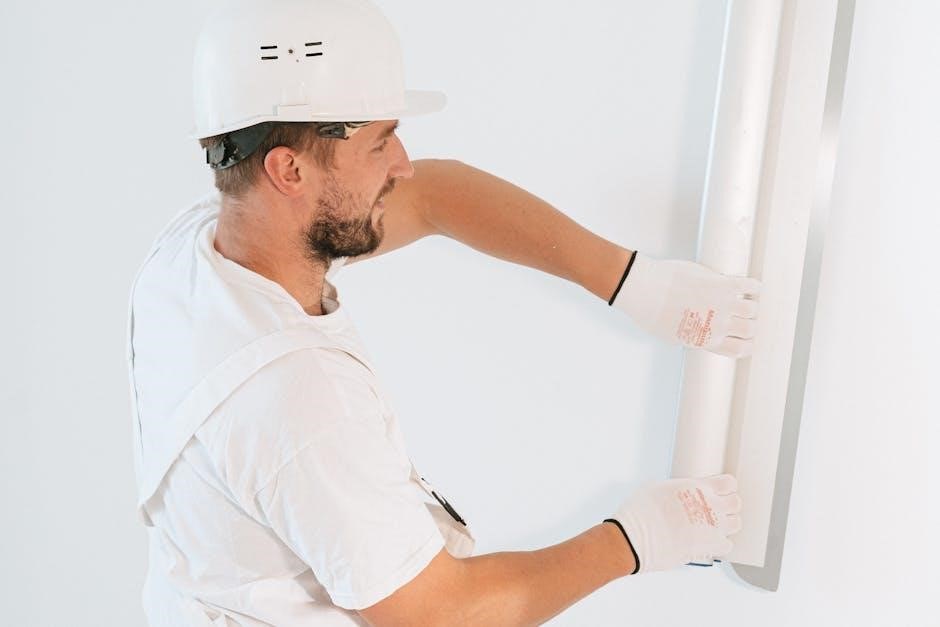
When lifting and positioning the drywall sheets, ensure they are snug against the framing members. Use a drywall lift or enlist the help of a partner for larger sheets. Secure the sheets to the studs or joists using drywall screws, spacing them approximately 12 inches apart along the edges and in the field.
Drive the screws straight and at the correct depth – enough to create a slight dimple without tearing the paper. Avoid over-driving the screws, as this can weaken the hold. If a screw misses the framing member, remove it and re-drive it in a slightly different location.
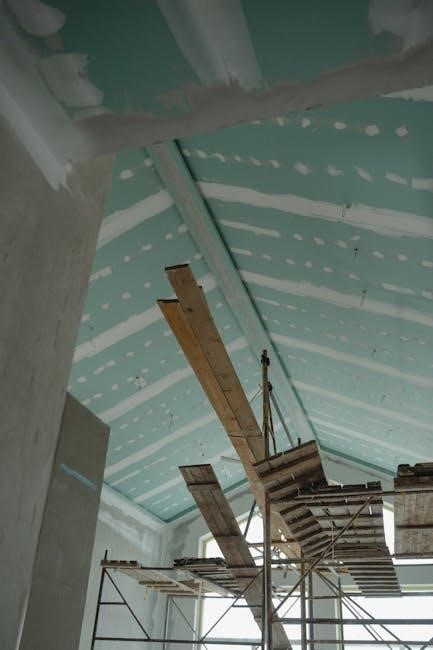
For corners and edges, ensure the drywall sheets are properly aligned and supported. Consider using drywall clips or wood blocks to reduce stress on corner joints. When installing drywall on ceilings, use wider top plates and strapping to provide additional support and prevent sagging. Remember to leave a small gap between sheets to allow for taping and mudding.
Taping and Mudding: The First Coat
The first coat of taping and mudding is a critical step in creating a seamless drywall surface. Begin by applying a thin layer of joint compound over the drywall seams, using a 4-6 inch taping knife. Embed the paper tape into the wet compound, ensuring it is centered over the seam and free of air bubbles. Press firmly to remove excess compound.
For inside corners, use a corner trowel to apply compound to both sides of the corner, then fold the paper tape and embed it into the compound. For outside corners, apply metal corner bead using compound or nails.
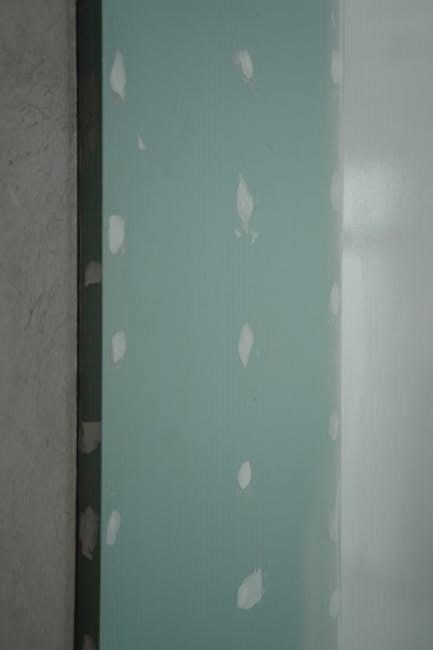
Allow the first coat to dry completely, typically overnight. Once dry, inspect the seams for imperfections, such as air bubbles or ridges. Use a taping knife to scrape away any loose compound or imperfections.
Before applying the second coat, ensure the surface is clean and dry. Feather the edges of the first coat to blend it smoothly with the surrounding drywall. The goal of the first coat is to create a solid base for subsequent coats, ensuring a strong and durable joint. A good quality flat white latex primer paint undiluted can be applied uniformly and allowed to dry before painting.
Sanding and Subsequent Coats
After the first coat of mud has thoroughly dried, the next step involves sanding and applying subsequent coats. Begin by using a sanding sponge or pole sander with a medium-grit sandpaper (around 120-grit) to lightly sand the dried mud. The goal here isn’t to remove all of the mud, but rather to smooth out any ridges, bumps, or imperfections left behind by the taping knife. Be careful not to sand too aggressively, as this can damage the paper tape beneath.
Once the first sanding is complete, wipe down the walls with a damp sponge to remove any dust. Now, it’s time to apply the second coat of mud. This coat should be wider than the first, feathering out even further onto the drywall surface. This helps to create a seamless transition between the mudded area and the surrounding wall.
Allow the second coat to dry completely, and then repeat the sanding process, this time using a finer-grit sandpaper (around 220-grit). Again, focus on smoothing out any imperfections and creating a smooth, even surface. Depending on the desired level of finish, you may need to apply a third coat of mud, repeating the sanding process after each coat. Remember to always wipe down the walls after sanding to remove dust.
Finishing: Priming and Painting
With the sanding complete and the drywall surface smooth and even, the next crucial step is priming. Priming is essential for several reasons. Firstly, it seals the porous surface of the drywall and the joint compound, creating a uniform base for the paint. Secondly, it enhances the adhesion of the paint, preventing it from peeling or blistering over time. Use a good quality flat white latex primer paint undiluted.
Apply the primer evenly using a roller or brush, ensuring complete coverage of the entire drywall surface. Allow the primer to dry thoroughly according to the manufacturer’s instructions. Once the primer is dry, inspect the surface for any remaining imperfections. If necessary, lightly sand any rough spots and wipe away the dust before proceeding to the painting stage.
Now, you’re ready to apply your chosen paint. Select a high-quality paint that is appropriate for the room and its intended use. Apply the paint in even coats, following the manufacturer’s instructions for drying time between coats. Depending on the color and coverage of the paint, you may need to apply two or more coats to achieve the desired result; Allow the paint to dry completely before enjoying your newly finished walls.
Troubleshooting Common Problems
Even with careful planning and execution, drywall installation can present challenges. One common issue is nail pops, caused by framing lumber movement. To fix, re-secure the drywall with screws and apply joint compound. Cracking along seams often arises from inadequate taping or movement. Widen the crack, re-tape, and apply multiple thin coats of compound.
Another problem is corner bead damage. Repair minor damage with joint compound. For severe damage, replace the corner bead. Bubbling in the joint compound indicates poor adhesion. Remove the affected area, re-tape if needed, and re-apply the compound. Uneven surfaces can result from inconsistent mudding or sanding. Apply additional thin coats of compound and sand carefully to blend the surface.
Sagging drywall, particularly on ceilings, suggests insufficient support. Add more screws or consider installing additional framing. If the drywall is too damaged, replace the sagging section. Prevent future issues by using proper screw spacing and ensuring adequate framing support. Address problems promptly to maintain the integrity and appearance of your drywall installation. Remember to consult professional resources when needed.